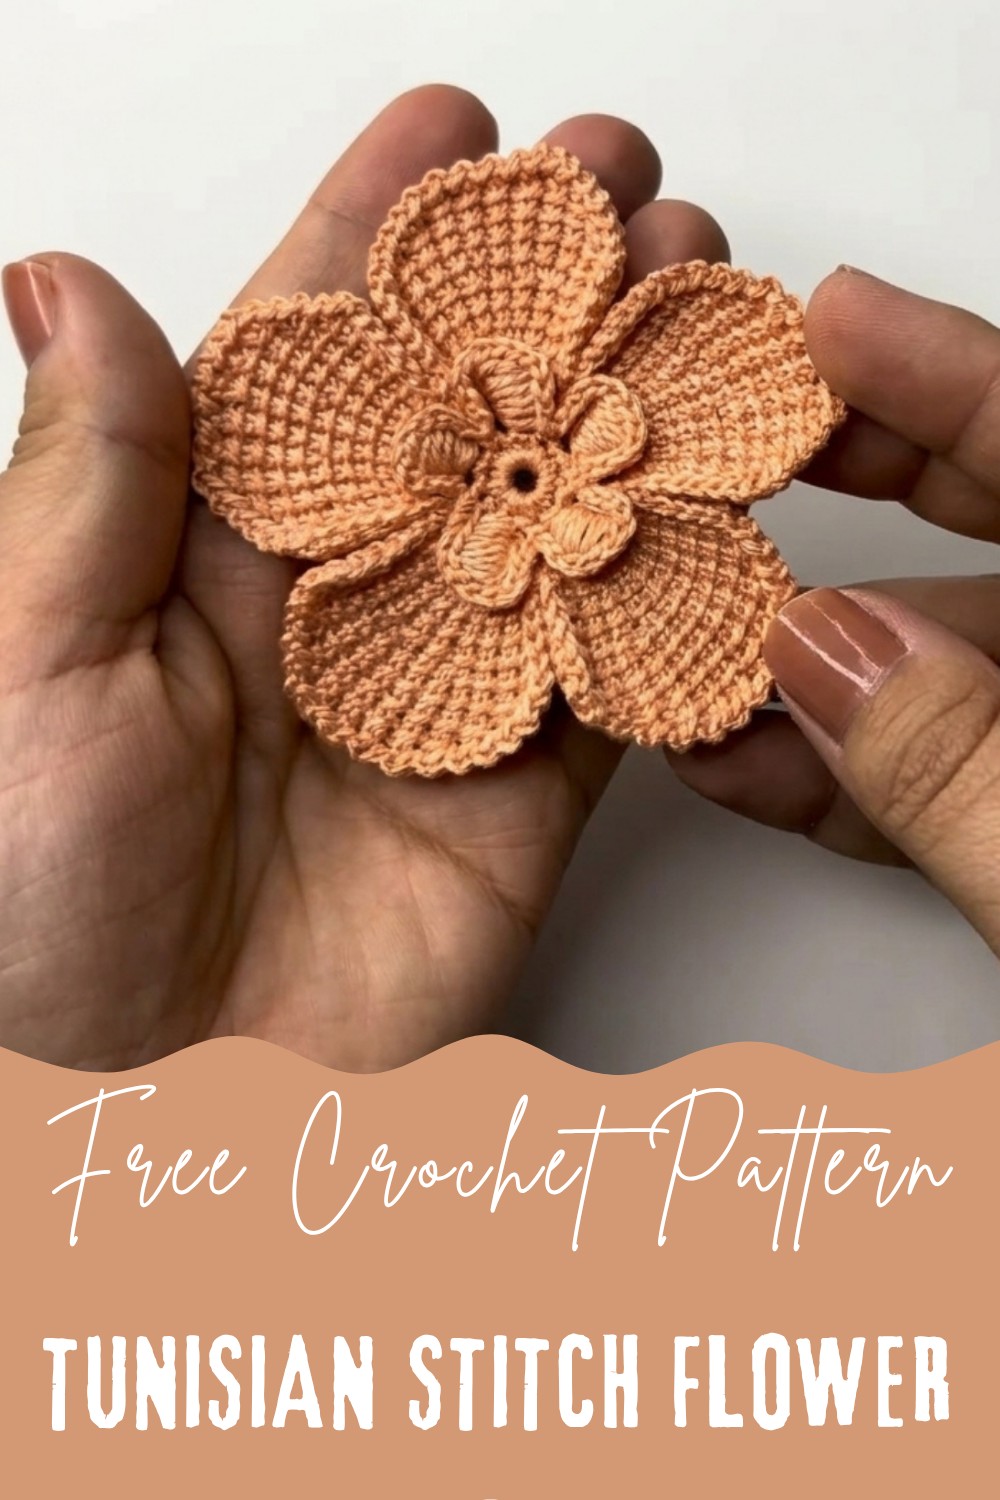
Make a beautiful and soft crochet flower with the Tunisian stitch using this free pattern, perfect for decorating bags, clothes, or adding charm to your home.
Have you ever wanted something small yet beautiful to highlight your favorite items? This crochet flower, made using the Tunisian stitch, is a perfect choice. It has a soft texture and unique details that instantly catch the eye. Its design is simple, making it easy for anyone to follow, whether you’re new to crochet or already familiar with it.
Easy and Free Crochet Tunisian Stitch Flower Pattern for All Levels

This flower carries so much versatility. It can be used as a decoration for bags, hats, or clothes, turning everyday items into something special. You could even use it for home decor, like pillows, curtains, or as a charming wall piece. Its neat and delicate appearance makes it ideal for thoughtful gifts too.
With its graceful design and ability to be used in creative ways, this crochet flower is a delightful addition whenever you’re looking for something beautiful and functional.

Crochet Tunisian Flower Pattern – Detailed Guide
Skill Level
Intermediate to Advanced.
This pattern involves working chain stitches, single crochet, puff stitches, and slip stitches, while incorporating Tunisian-style techniques.
Materials
- Thread:
- Sterling Thread, Thickness Number 5 or a similar crochet thread with a smooth finish.
- Ensure high-quality thread for sharp stitch definition.
- Hook:
- 1.0 mm crochet hook (fine hook for detailed stitch work).
- Optional Tools:
- Fabric glue (for securing ends).
- Iron/flat press (to shape petals).
- Scissors.
Key Abbreviations (US Terminology)
| Abbreviation | Meaning |
|---|---|
| ch | Chain Stitch |
| sc | Single Crochet |
| sl st | Slip Stitch |
| puff st | Puff Stitch |
| inc | Increase (2 stitches in one stitch) |
Special Notes
- Tunisian Techniques in Circular Designs:
This pattern uses techniques found in Tunisian crochet, such as loops held on the hook and removed in sequence to craft petals with depth and texture. - Petal Symmetry:
Precise stitch placement is vital for a balanced flower. Use a marker if needed to track your starting point. - Prevent Curling:
Careful blocking (e.g., steaming or pressing lightly) may help maintain petal shape and prevent curling at edges.
Pattern Instructions
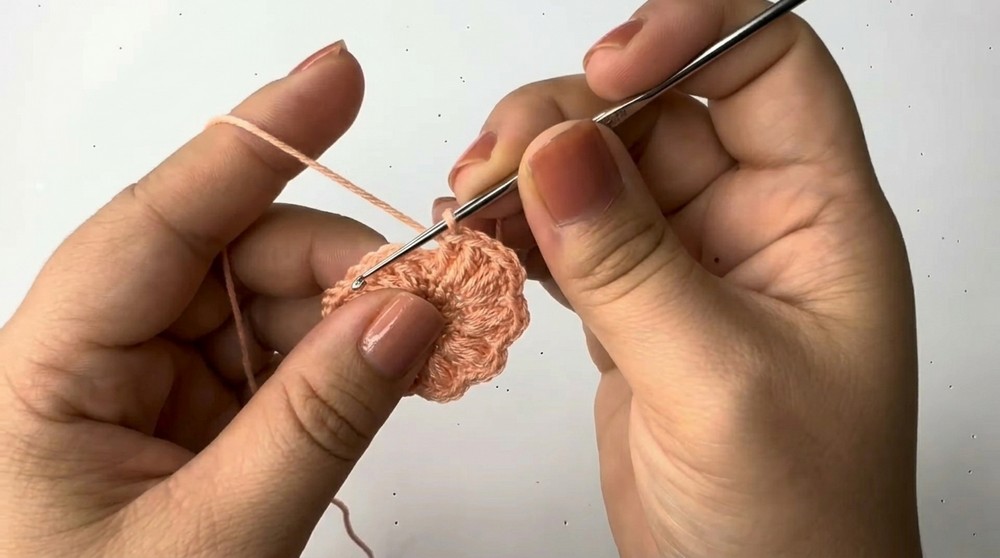
Step 1: Flower Center
- Begin with a Foundation Loop:
- Chain 5, join into a circle using a sl st in the first chain.
- Work 10 Single Crochet into the Circle:
- Chain 1 to begin.
- Make 10 sc directly into the center of the ring.
- Join with a sl st into the first sc to close.

Step 2: Petal Setup Round
- Make Chain Loops:
- Chain 4, then work 1 dc next to the last stitch.
- Chain 1 and prepare to form a puff stitch below this dc.
- Puff Stitch Foundation in Petal:
- Slip the hook under the base of the dc stitch and pull up a loop. Repeat this process 3 times (you will have loops on the hook).
- Yarn over and pull through all loops at once.
- Chain 1 to secure.
- Repeat to Form Additional Petals:
- Chain 4, create another dc next to your last base stitch, and repeat the puff stitch process.
- Work a total of 5 petals around. Use sl st to join the final petal.

Step 3: Zigzag Edging
- Begin the Zigzag Base:
- Chain 6, slip into two small straps at the base of each puff petal, securing with sc.
- Continue working ch 6 + sc uniformly around each petal base.
- Work Zigzag Layers:
- Chain 6 after completing the base round in sc.
- Insert the hook into the second chain, pull up a loop, and repeat pulling loops across.
- Remove each loop one at a time from the hook using yarn overs, finishing with a chain.
- Repeat the Zigzag Process for Depth:
- Continue working zigzag stitches for subsequent layers, gradually decreasing stitches to taper the petal.
Step 4: Decreasing for Petal Shapes
- Decrease Rows for Petals:
- Skip the first stitch after each decreasing round. This method narrows down the petal.
- For each round, maintain the loop-removal process to gradually taper until the final petal layer is complete.
- Finish Each Petal:
- Close with a slip stitch. Secure the round by pulling yarn tightly at the end.
- Repeat Steps for Remaining Petals:
- Work sequentially across all petals using the same method, completing zigzag edging and tapering for uniform petal shapes.
Step 5: Final Edging and Bottom Finishing
- Zigzag Fill Between Petals:
- Work single crochet evenly into the base of each petal to create a clean finish.
- Zigzag stitches can be added for decorative purposes around gaps between petal bases.
- Smooth Petal Transition:
- Use slip stitches along the petal edges and base to blend layers neatly.

Finishing the Flower
- Secure Ends:
- Glue the thread tips using fabric glue to prevent fraying.
- Alternatively, weave the ends securely using a tapestry needle.
- Shape Petals:
- Use a warm iron or flat press to gently shape the petals into form.
- Do not flatten excessively to retain the flower’s textured look.
Custom Suggestions
- Thread Variations:
- Use metallic thread or variegated yarn for added flair.
- Applications:
- Sew onto a bag, garment, or pillow using stitches that match the thread color.
- Combine multiple flowers to form garlands or bouquet-style decor.
- Layering:
- Use smaller or larger flowers layered together for eye-catching effects.
Final Words & Tips
This Tunisian flower delivers elegance and texture, ideal for intermediate crocheters eager to experiment with decorative designs. Avoid rushing through puff stitches; the texture thrives on precision. Blocking and smart finishing techniques can elevate the flower’s aesthetic.
Pattern Corrections
Ensure consistency in chain lengths during setup rounds for uniform petals. Skip stitches carefully to avoid misalignment.
Maintenance Tips
- Keep flower clean and dust-free by storing in breathable fabric bags.
- Avoid over-stretching.