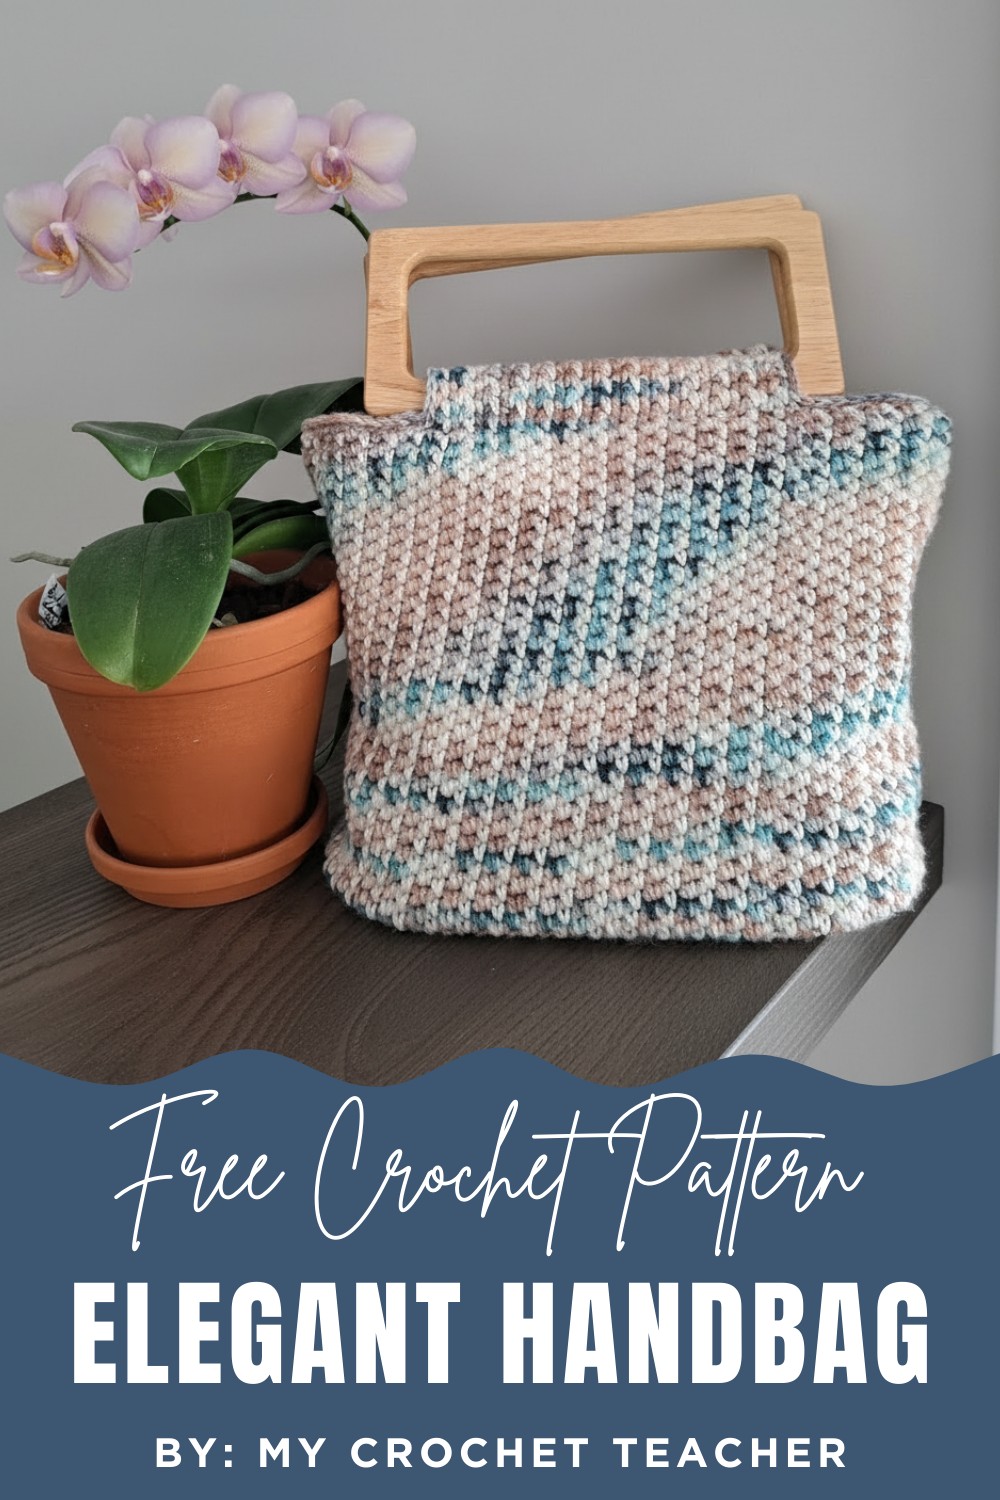
Upgrade your style with this free Crochet Handbag Pattern to carry a chic, trendy, and versatile bag that adds charm and elegance to any outfit.
A crochet pattern is the perfect project for adding a handmade touch to your everyday style. Whether you’re looking for a chic market tote, a trendy crossbody bag, or a sturdy purse, crochet offers endless design possibilities.
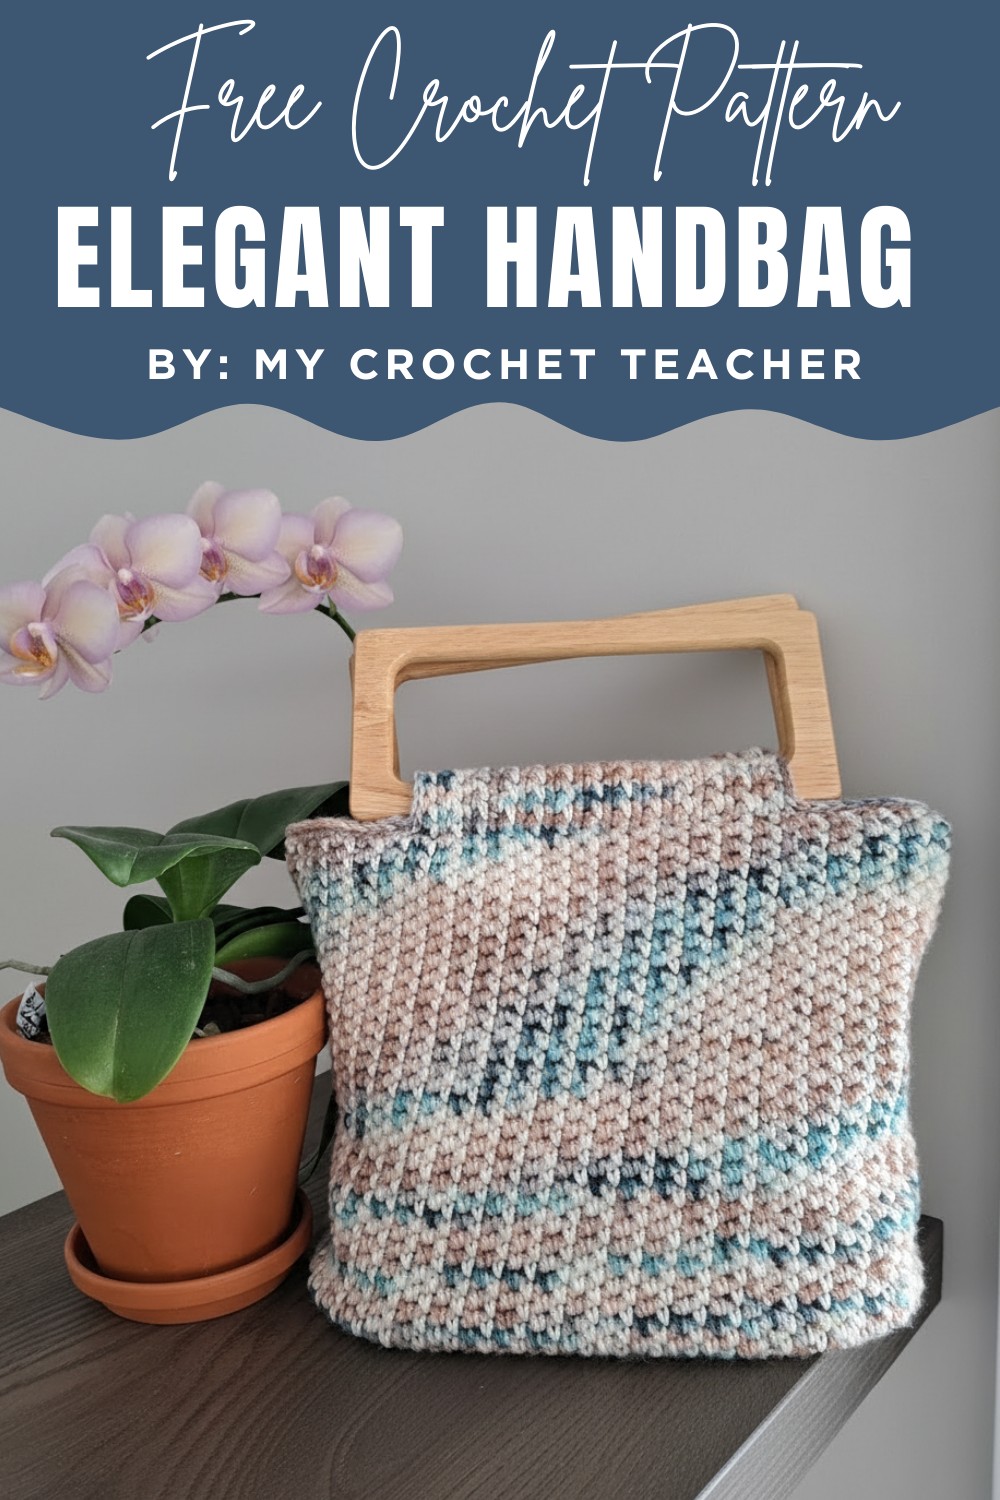
With just a hook and some yarn, you can create a beautiful and functional accessory that’s both stylish and practical. From beginner-friendly designs with basic stitches to intricate textures and unique embellishments, there’s a pattern for every skill level. Customize your handbag with your favorite colors, add lining for extra durability, and finish it off with stylish handles or a button closure.
Materials Needed
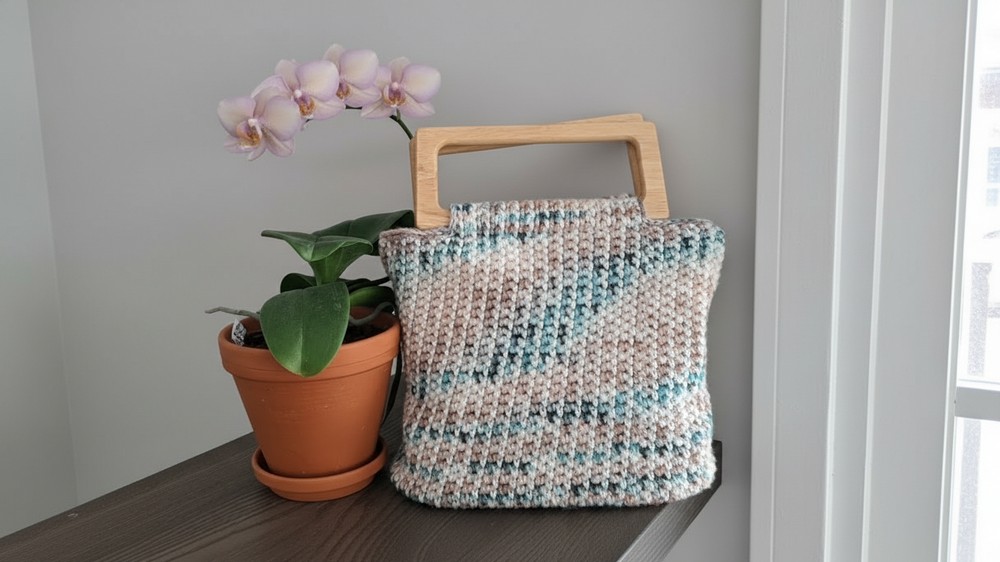
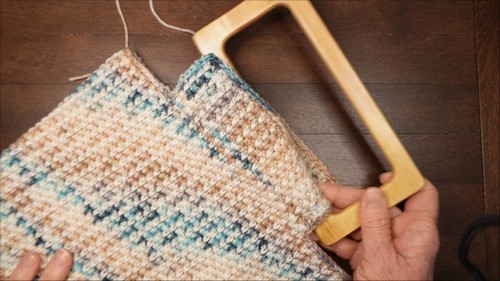
- Handles: Rectangular handles, long chain handle, or wooden handles
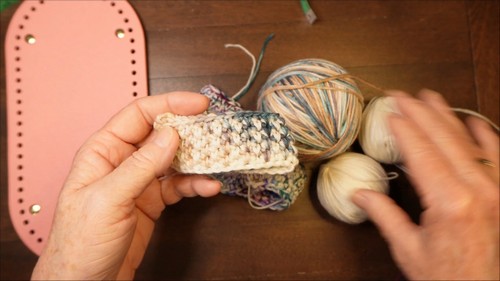
- Bag base: Leather or leather-type product with metal feet and holes around the edge.
- Various metal hardware: D-rings, clasps, magnet clasp.
- Yarn: Wool from Arcane Fiber Works and additional yarn for filling out as needed.
- Crochet hook: Appropriate size for your yarn.
- Cotton thread: For sewing parts that need strength.
- Sewing machine: Optional for lining.
- Kitchen scale: To measure yarn weight.
Step-by-Step Instructions
Choose Handles:
- Wendy decided on the rectangular handles because it allows making the top of the bag straight across.
Select Yarn:
- Wendy used yarn with a mix of colors (pink, cream, variegated) to create a pattern. She combined skeins to achieve the desired look.
Creating the Main Bag Body

Pattern Choice:
- Wendy selected a drop-down stitch for its dense and neat appearance.
Stitch Description:
- Wendy alternates colors every row to create a nice pattern. For each row, she does a single crochet in one color followed by a drop-down single crochet in the other color.
Crochet Instructions:
Foundation Chain:
- Chain stitch 100.
Base Round:
-
- For every 9 holes in the bag base, make 12 stitches.
- Measure around the base and calculate stitches accordingly.
Stitching:
-
- Alternate between cream and variegated yarn every row.
- Single crochet a row in one color.
- Next row, drop-down single crochet (under stitch from previous row).
Adjusting for Shape
Shaping for Base:
-
- After initial rows, fit fabric around the base, ensuring it doesn't extend out the sides.
Reduction for Base:
-
- Wendy needed to reduce 99 stitches to fit into 60 holes.
- Use single crochet three stitches into two to adapt.
Fastening Bag Base
Stitch Preparation:
-
- Perform a slip stitch edging around the bottom.
Stitching to Base:
-
- Hand sew the bag body to the base using cotton thread for stability.
- Mark the edges ensuring even alignment for handles.
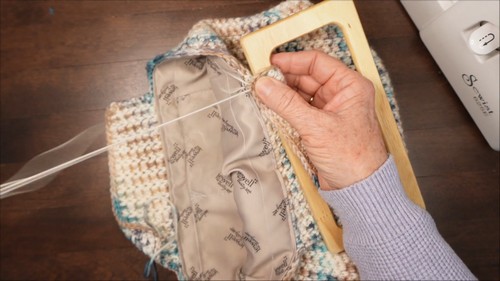
Finishing the Top Edges
Edge and Handle Preparation:
-
- Crochet a few rows back and forth to create strip for fastening handles.
- Ensure equally spaced strips on opposite sides.
Slip Stitch Edge Finishing:
-
- Slip stitch along the top edge for a neat finish.
Sewing in the Lining
Recycling Lining:
-
- Repurpose a lining from an old bag.
- Measure, adjust, and sew the lining into the bag.
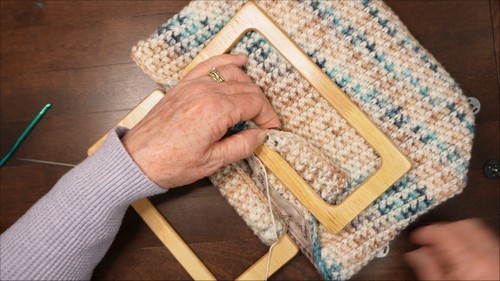
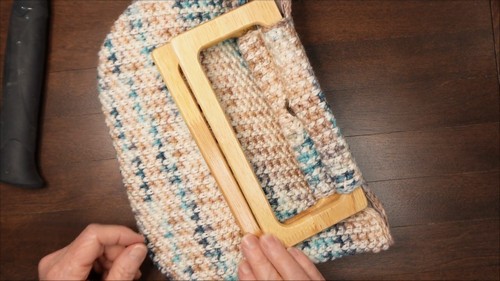
Attaching Handles and Closure
Handles:
-
- Wrap strips around handles and hand sew with cotton thread.
Magnet Clasps:
-
- Attach magnet clasps to inner top edges following product instructions.
Final Notes
Lining:
-
- Add the lining after base and handles are attached to ensure proper fit.
Customization:
-
- Adjust pattern as needed for yarn availability and preferences.
Review:
-
- Always verify alignment and handle placement before final sewing.