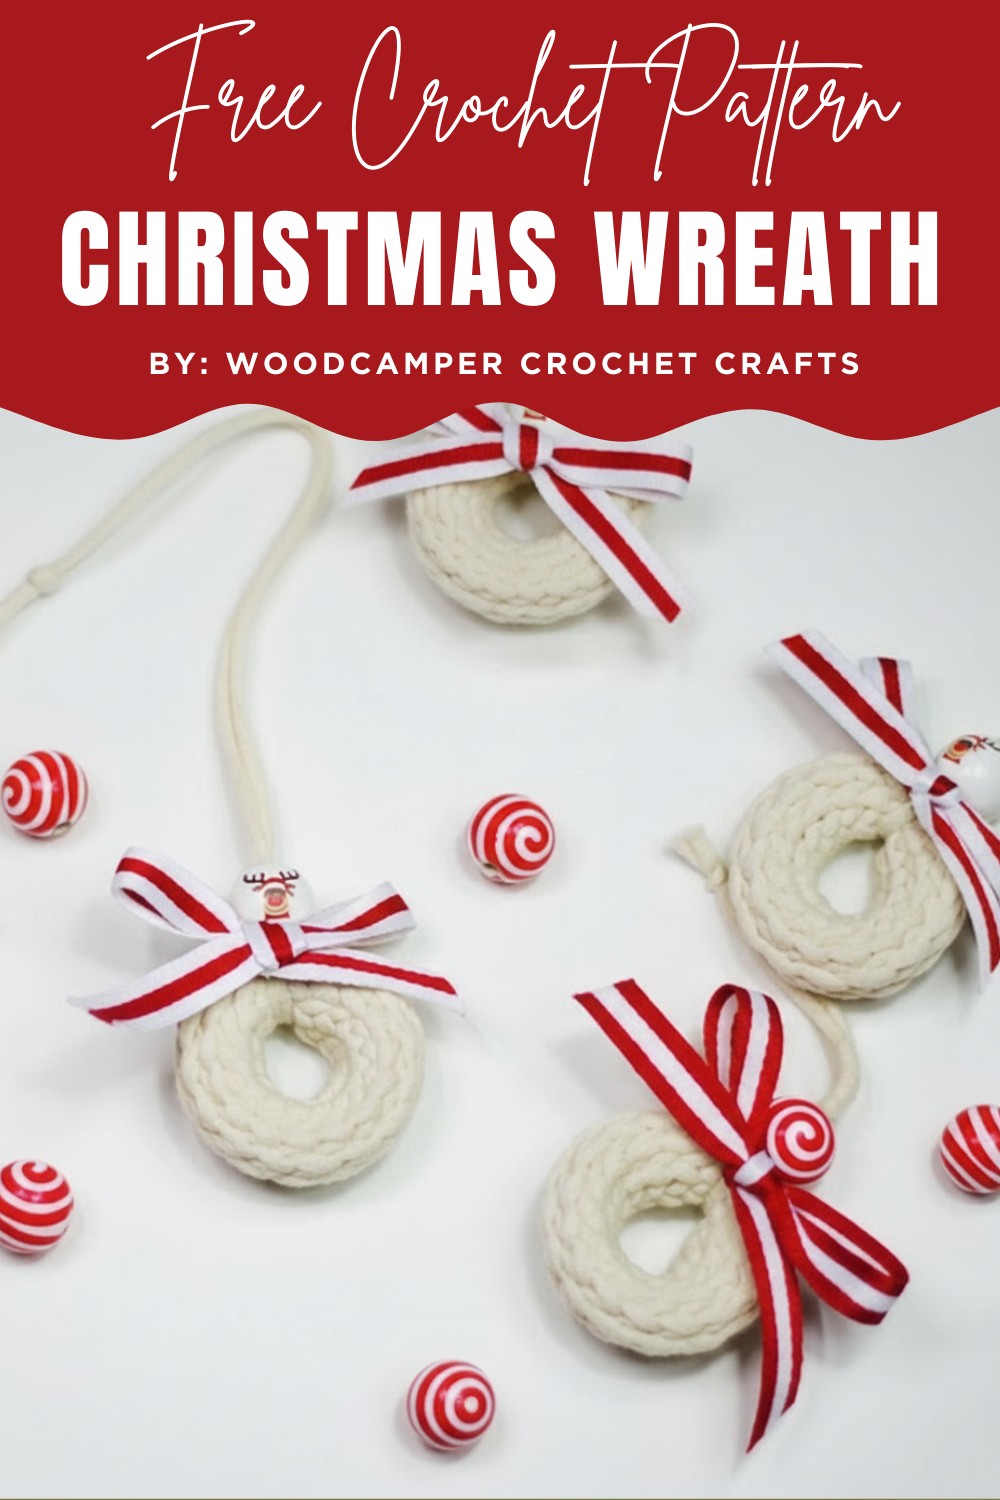
Deck your home with a festive Crochet Christmas Wreath Pattern that adds cozy holiday charm, colorful flair, and cheerful style to every door.
Add a festive touch to your holiday decor with this Decorations Pattern! Perfect for beginners and experienced crocheters alike, this pattern lets you create charming mini wreaths that can be used as ornaments, gift toppers, or even garlands.
Stylish Crochet Christmas Wreath Pattern to Add Holiday Magic
Whether you prefer classic green and red or a modern color twist, these wreaths work up quickly and make great last-minute holiday projects. Grab your yarn and hook to bring handmade warmth to your Christmas celebrations!

Materials Needed
- 6.5 mm crochet hook
- Stitch marker
- Darning needle
- Scissors
- Ribbon
- Beads
- Glue gun (or needle and thread)
- Yarn (bulky, cotton-nylon blend suggested - used in video: Yarn Inspiration Bernat Maker Home Yarn)
Instructions

Start with a Slip Knot:
- Leave a long tail (about 6 inches) to hang your decoration.
- Start by making a slip knot and insert your hook, pulling tight.
Chain 10:
- Yarn over and pull through to make one chain.
- Repeat until you have a total of 10 chains.

Join the Chain:
- Insert your hook into the first chain.
- Do a simple slip stitch (yarn over and pull through all loops on your hook) to join the chain into a circle.
Single Crochets in the Circle:
- Do 15 single crochets in the circle.
- Insert your hook into the circle.
- Yarn over and pull through (you should have two loops on the hook).
- Yarn over and pull through both loops to complete the single crochet.

- Place a stitch marker in the first single crochet to mark your position.
- Continue around, making a total of 15 single crochets.
Slip Stitches for Six Rows:
- For the next six rows, work 15 slip stitches per row.
- Insert your hook into the next stitch.
- Yarn over and pull through all loops on your hook to make a slip stitch.
- Use the stitch marker to mark the beginning of each row, if necessary.
Align the Ends:
- After completing six rows, check if your ends (tails) line up.
- If they do not line up, do extra slip stitches as needed (in the video, Pam did three more slip stitches).

Finish Off:
- Cut the yarn, leaving another long tail (about 6 inches).
- Pull the end through the final loop and pull tight to secure it.
Forming the Wreath:
- Roll the yarn to form the wreath.
- Tuck in the end to secure the wreath shape.
Attaching the Hanging Loop:
- Pull both ends (tails) from the back through the middle to the front of the wreath.
- Create a loop at the back and tie the ends through it.
- Pull tight to secure.

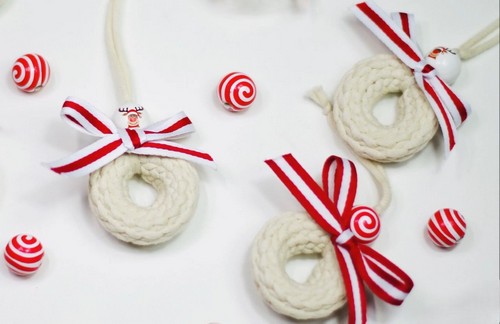
Adding Beads:
- Use a darning needle to thread a bead onto each end of the yarn.
- Push the beads down and tie a knot to secure them.
- Cut the ends to make them even. Optionally, tie a knot at the top of the beads.
Adding the Bow:
- Create a bow using the bunny ears method (make two loops and tie them together).
- Cut the ends of the ribbon.
- Attach the bow to the wreath:
- For a temporary hold: Use a glue gun.
- For a more secure hold (especially if selling): Sew the bow on.
Final Touch
- Adjust the wreath and bow as needed to get the desired look.
- Your holiday wreath decoration is now complete!
- If you have any questions or need further clarifications, feel free to ask. Enjoy your crafting!
Unique Crochet Christmas Wreath Pattern for a Cozy Holiday Touch
