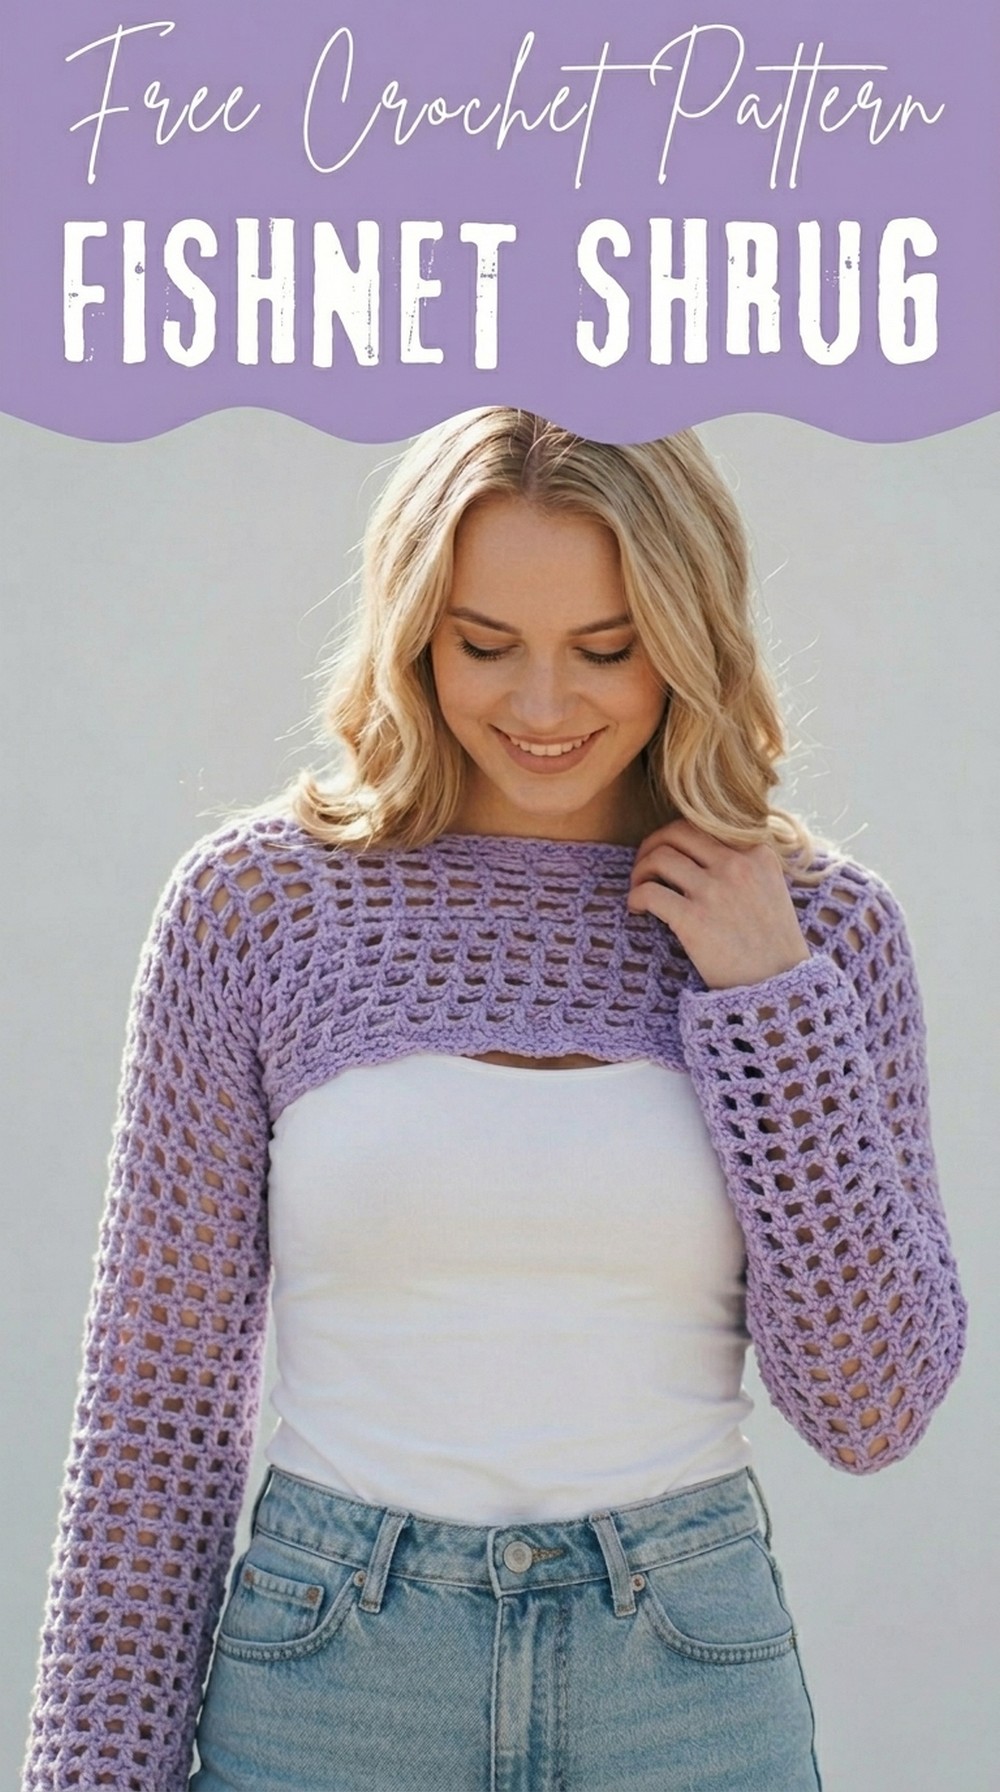
Style your look with this Free Crochet Fishnet Shrug Pattern, a lightweight and elegant layer that pairs beautifully with any outfit for every occasion.
Looking for a stylish and lightweight layering option? This crochet shrug is both fashionable and functional. It features a delicate fishnet design, giving it a breathable and airy appearance that’s perfect for warmer days or adding a touch of elegance to your outfit. The shrug is made with simple stitches that create a flowy look, making it versatile for casual wear or special occasions.
Stylish Free Crochet Fishnet Shrug Pattern with a Modern Touch
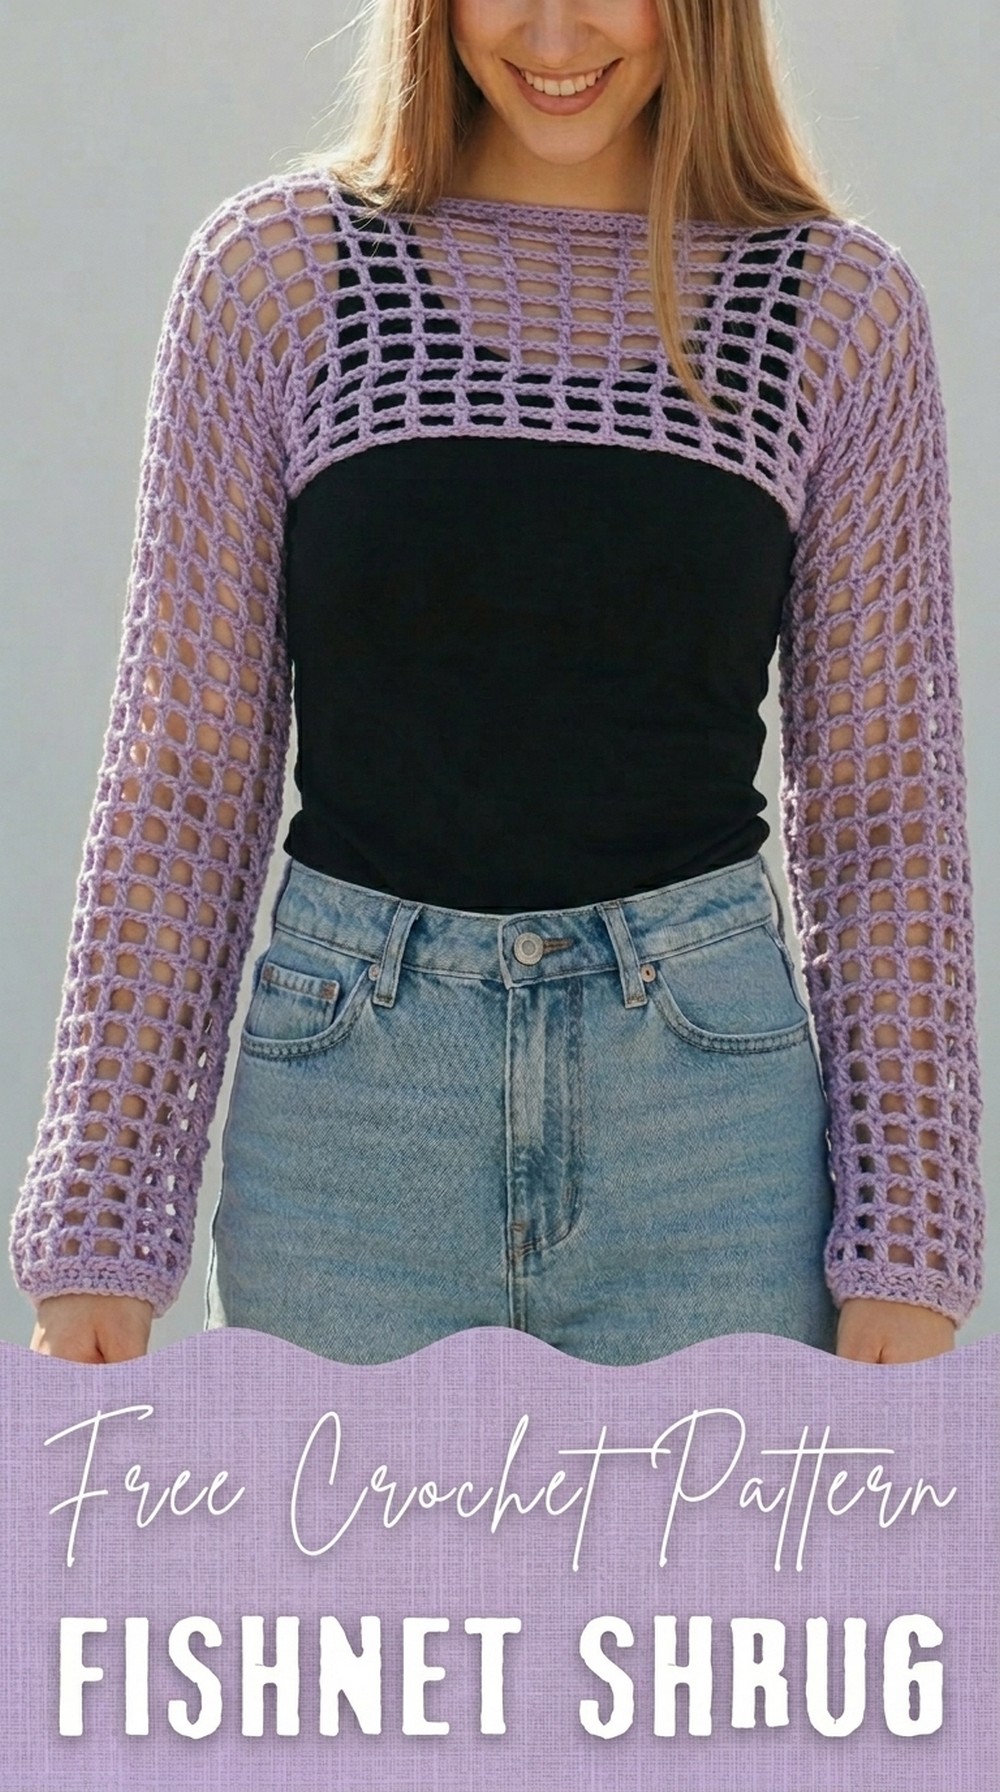
Its open design allows for easy pairing with dresses, tops, or even tank tops, giving you endless outfit options. The texture is soft and comfortable, while the unique fishnet style brings a modern and trendy vibe. Whether you’re dressing up or staying casual, this shrug stands out with its charming and practical design. It’s easy to make, and the finished look is beautiful and timeless for anyone to enjoy.
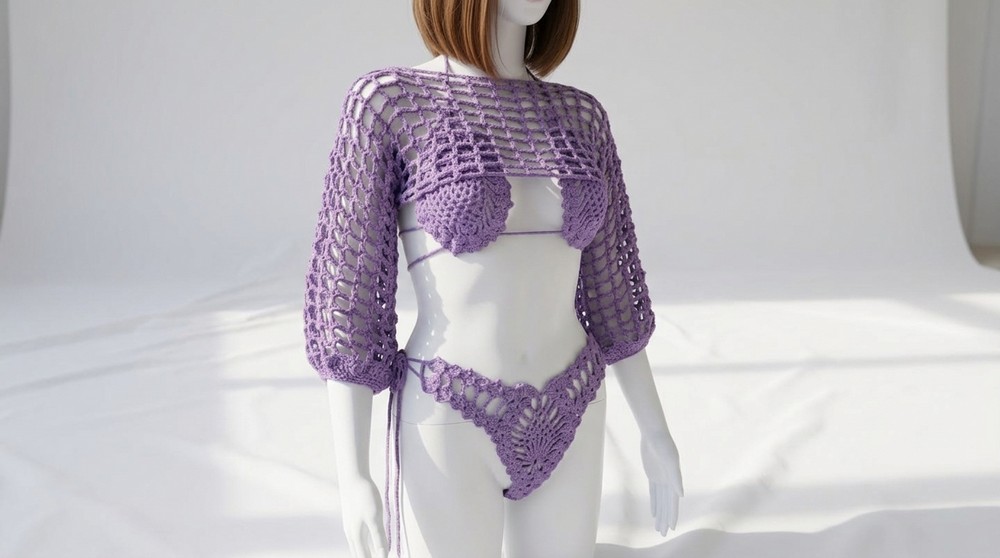
Crochet Short-Sleeve Shrug Pattern
1. Materials Needed
To recreate this shrug, gather the following materials:
- Yarn:
- Yarn used: Bernat Handicrafter (100% cotton).
- Yardage: Approximately 250–300 yards for the shrug (short-sleeve style).
- Color: Any preferred shade (the Lavender color is soft and perfect for summer).
- Crochet Hook:
- 6.0 mm crochet hook (J/10).
- Notions:
- Pair of scissors.
- Darning needle (for weaving in ends).
- Stitch markers (useful for tracking rounds).
2. Gauge
- Gauge for body pattern:
- 1 square (3 chains + 1 double crochet) = 1 inch.
- 10 rows = 5 inches.
To ensure the final shrug fits perfectly, measure your gauge with the starting pattern. Adjust your hook size if needed.
3. Finished Size
- Neckline opening: Approximately 28–30 inches (adjustable).
- Body width: 35 inches.
- Length (shoulder to bottom): 16 inches.
- Sleeve length: 14 rows or as desired; adjust length if needed for full-length or cap sleeves.
Customization instructions are provided below.
4. Special Techniques Used
This pattern includes the following stitches (US Terminology):
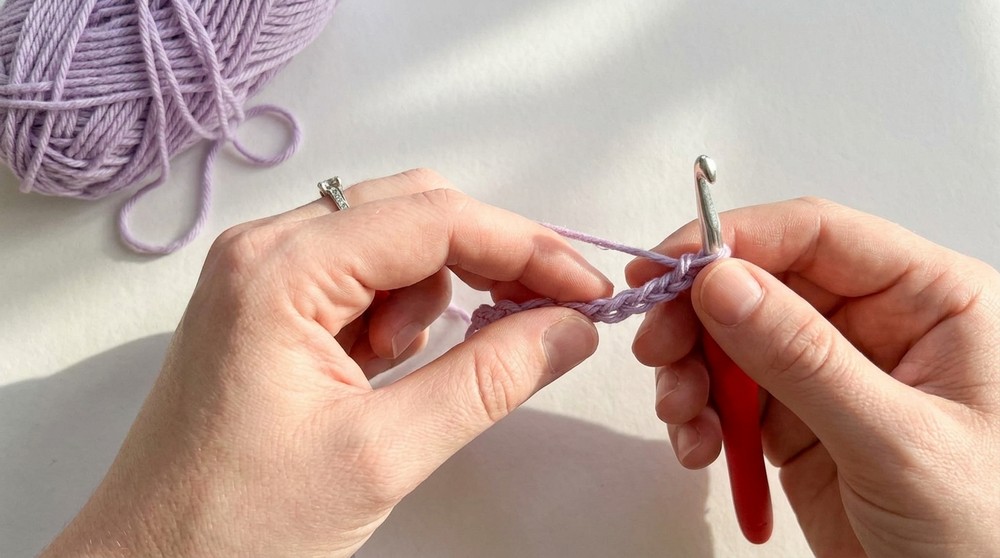
- Slip Knot: To start your foundation chain.
- Chain Stitch (CH): Basic crochet chain for creating spaces.
- Double Crochet (DC): Main stitch of the shrug body.
- Half Double Crochet (HDC): Used for sleeve cuffs.
- Single Crochet (SC): Used for finishing edges.
- Joining Squares: Joining sides for the sleeves with simple slip stitches.
Each technique will be covered in the pattern instructions for clarity.
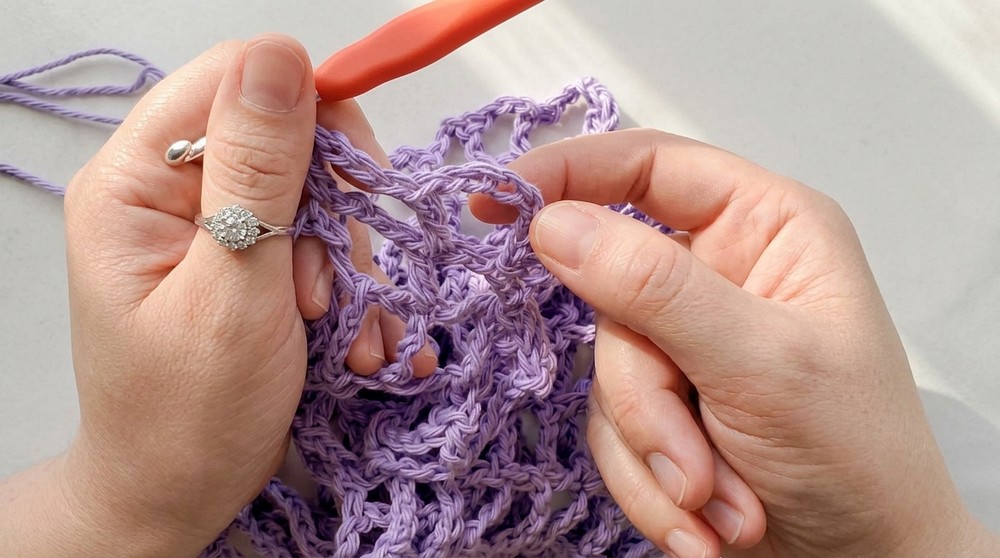
5. Pattern Instructions
Step 1: Shrug Body
- Start the Foundation Chain:
- Create a slip knot and chain 66 stitches.
- This will serve as the foundation for the shrug. Ensure the chain is not too tight.
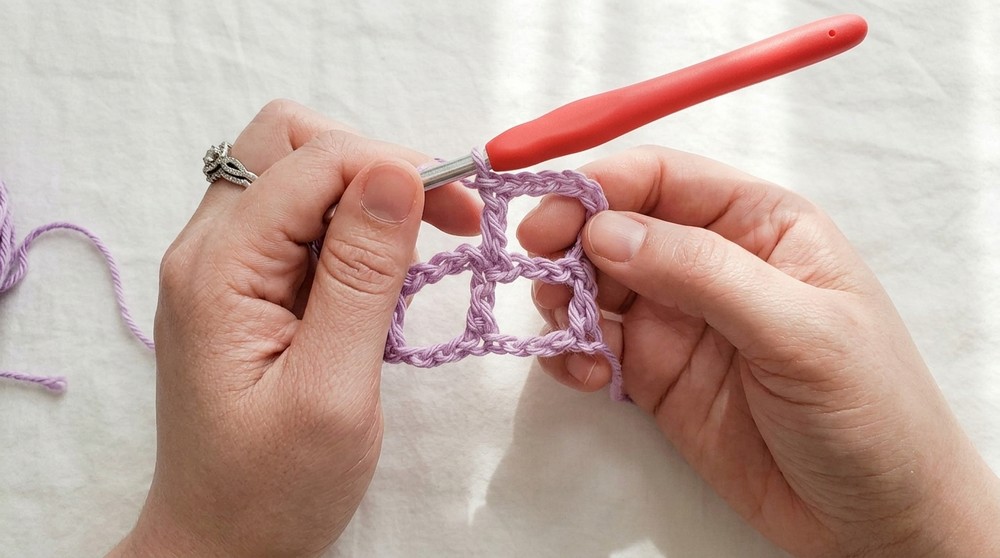
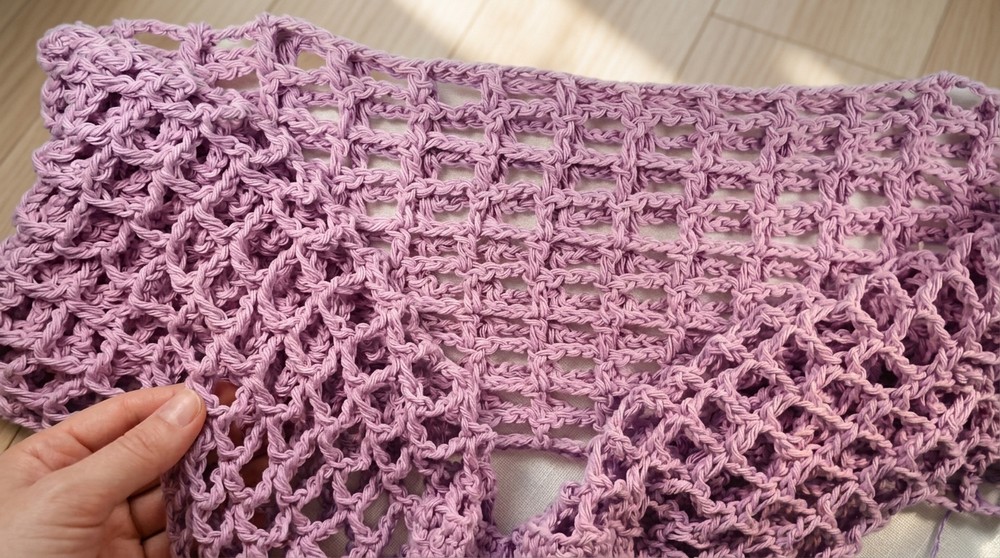
- First Row (Create Square Pattern):
- Begin by counting 10 stitches after the hook. In the 10th chain, yarn over and make a Double Crochet (DC).
- The skipped chains will count as the first "chain-3 space" in your square pattern.
- Chain 3 (CH 3) and skip 3 stitches in the foundation chain.
- In the 4th stitch, make a DC.
- Repeat: (CH 3, Skip 3 stitches, DC in the 4th stitch) across until the entire row is completed.
- You should have 15 squares in the row.
- Begin by counting 10 stitches after the hook. In the 10th chain, yarn over and make a Double Crochet (DC).
- Turn and Continue to Row 10:
- Row 2:
- Chain 6 (CH 6) to start (this counts as a CH 3 space and 1 DC).
- Turn your work and place a DC into the top of the first DC from the row below.
- (CH 3, DC on top of the next DC in the row below) until the end of the row.
- At the end of each row, make sure to place the last DC in the top of the chain-3 from the previous turning chain.
- Repeat this for 10 total rows, maintaining the square design.
- Row 2:

Step 2: Create the Neckline
- Once the 10 rows of squares are completed, mark the neckline opening:
- Work across and create 3 squares, then stop and chain 35 stitches for the neckline loop.
- Skip 10 squares of the midsection for the opening, then attach the chain to the next square with a DC.
- Continue creating squares on the body, maintaining the pattern till the end of the row.
- For the next rows:
- Work the ordinary square pattern on both sides of the neckline opening, including the chain section.
- Maintain the row increase and decreases as before.
Step 3: Join Shrug Sides
- Fold the shrug in half so the edges align with each other.
- To form the sleeves:
- Decide how wide you want the sleeve opening to be.
- For this design, place stitch markers 2 squares from the bottom edge and join the sides up to the neckline.
- Use slip stitches to join the edges together, working square-by-square for a clean finish.
Step 4: Sleeves
For the short sleeve:
- Attach Yarn: After joining the side edges, start at the armhole opening to attach your yarn.
- Pattern for Sleeve Squares:
- Work a square pattern in the round (as per the body). Each round begins with CH 6 and ends with a slip stitch into the chain-start.
- Continue working squares for 14 rows.
- Cuff:
- Switch to single crochet rounds for the sleeve cuff.
- In the first cuff row, make 1 SC in each stitch around. Use decreases (insert hook, pull up a loop, insert hook in next, pull up a loop, and yarn over through all three) to tighten the cuff as needed.
- Optionally, repeat a final SC row to finish the edge.
- Second Sleeve: Repeat the steps above for the second arm.
Step 5: Finishing
- Weave in any loose ends using a darning needle.
- Check all joins to make sure they are secure.
- Lightly block the shrug if your yarn permits to help the stitches relax and the neckline and cuffs lay flat.
6. Tips for Success
- Measure as You Go: Always check the neckline and arm opening dimensions before proceeding to ensure the fit matches your measurements.
- Customize the Sleeve: Want longer sleeves? Continue rounds beyond 14 until your desired length is achieved.
- Experiment with Colors: Use contrasting or variegated yarns to make the shrug more vibrant.
7. Customization Ideas
- Long Sleeves: Continue the sleeve rounds to reach wrist length. Add ribbing for a snug fit.
- Oversized Fit: Add more foundation chains to increase the width of the body.
- Textural Variations: Incorporate different stitch patterns, such as shells or puff stitches, into the body for a unique design.
8. Conclusion
This short-sleeve shrug is a beautifully simple and elegant project, ideal for layering in warmer weather. Its customizable design, incorporating the square pattern and neckline opening, allows you to tailor it for your preferred fit and style. The final product is lightweight, versatile, and perfect for dressing up casual outfits.
Final Look:
The shrug should feature:
- Neat and evenly spaced squares in the main body.
- A clean neckline opening.
- Short sleeves with a tapered cuff, giving a polished and professional finish.