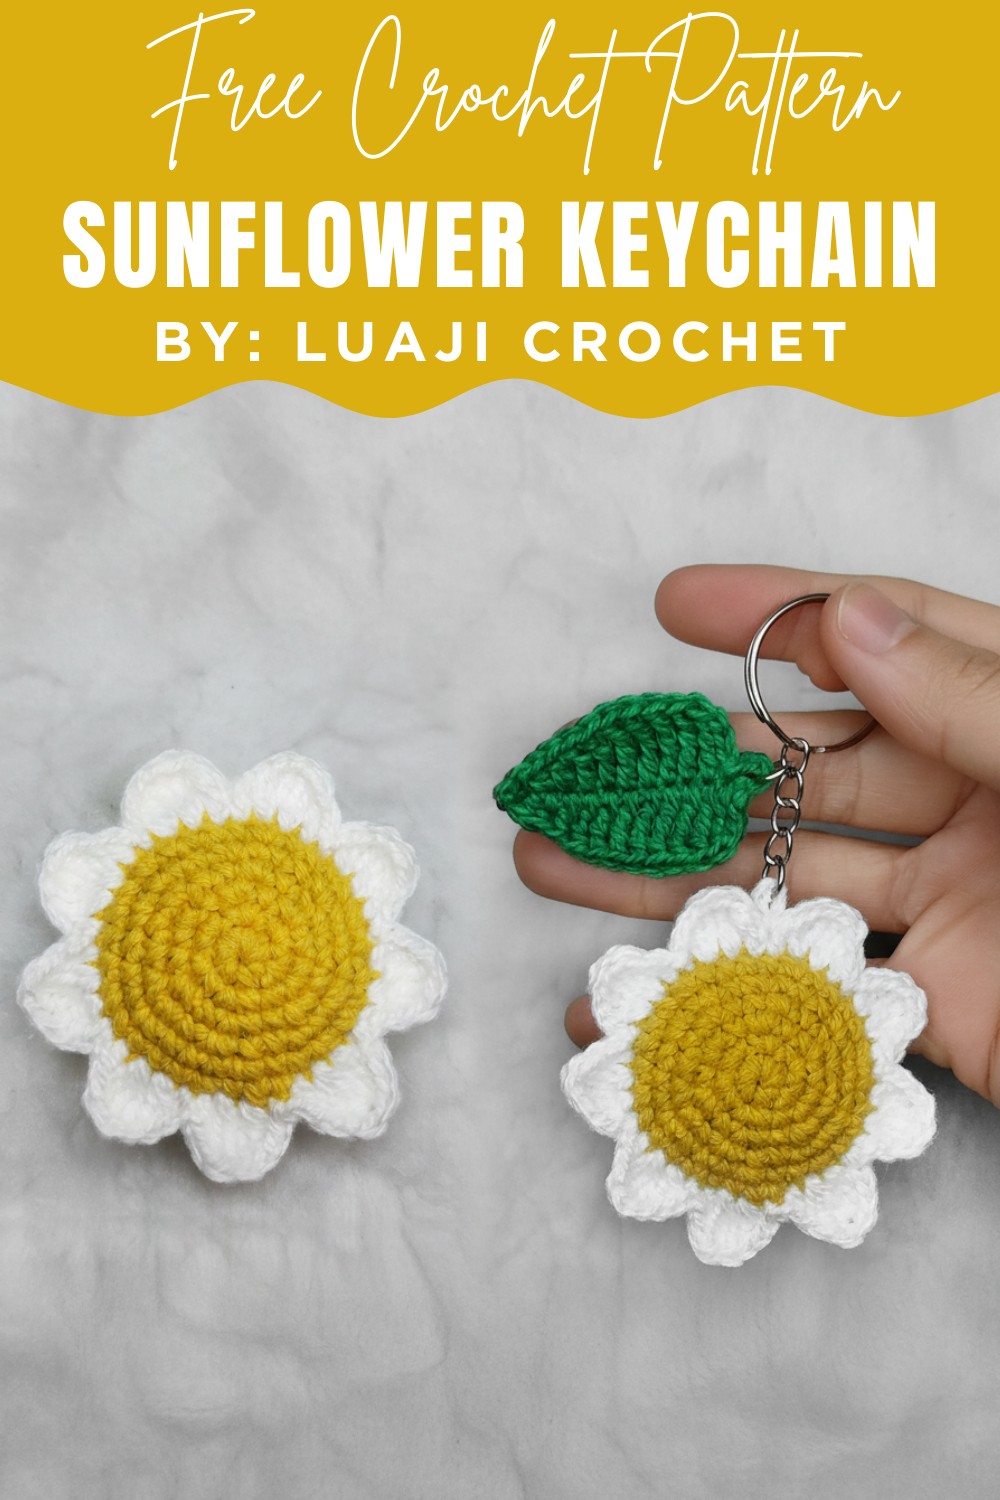
Learn the Secret to Crochet Sunflower Keychain Pattern Easily
This crochet project does more than just serve as a cute ornamental piece—it’s also an excellent stress-relieving activity. By working on this easy and rewarding pattern, crocheters can hone their skills while crocheting something practical and visually appealing. Plus, it's a fantastic opportunity to use up leftover yarn and experiment with different colors to personalize your design.
Lightweight and durable, the finished product is easy to carry around and stands up well to everyday use. Whether you attach it to a backpack, purse, or use it as a charming, pocket-sized comfort item, this pattern combines fun and function. With its cheerful sunflower pattern, this pattern will brighten not just your keys but also your day, carrying the warmth of handmade love wherever it goes.
Key Features
- Quick and Simple: The pattern is fast to complete, ideal for beginners and advanced crocheters.
- Customizable Design: Adjust petal or leaf size and add more embellishments.
- Functional and Decorative: Works great as a cheerful keychain or charming bag tag.
- Unique Construction: Includes shaping techniques like double treble crochet and structured petals.
Difficulty Level:
Beginner-friendly, with clear instructions for basic stitches such as single crochet, slip stitch, and treble crochet, alongside some advanced techniques like double treble crochet.
What You’ll Need:
- 2mm Crochet Hook
- Medium-weight Yarn (two colors: yellow for the flower center, white for petals, green for a leaf)
- Scissors
- Acrylic Filling for flower center stuffing
- Jump Rings
- Keychain Ring
Step-by-Step Pattern
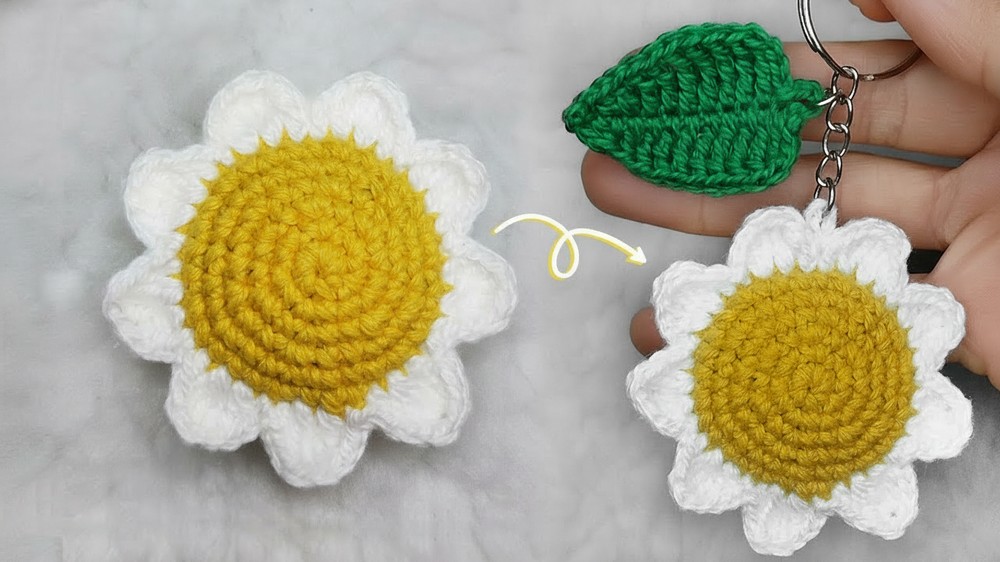
Step 1: Crochet the Daisy Center
- Magic Ring: Start with a Magic Ring and crochet 6 Single Crochets into it. Pull to close the ring snugly and Slip Stitch into the first stitch.
- Round 2: Work 6 increases (2 Single Crochets in every stitch). You'll have 12 stitches.
- Round 3: Work 1 Single Crochet, 1 increase (repeat 6 times). End with 18 stitches.
- Round 4: Begin with 1 Single Crochet and 1 increase, then 2 Single Crochets, 1 increase (repeat 5 times). Finish with 1 Single Crochet for a total of 24 stitches.
- Round 5: Crochet a sequence of 3 Single Crochets, 1 increase six times. You'll have 30 stitches.
- Round 6: Work 2 Single Crochets, 1 increase, followed by 4 Single Crochets, 1 increase repeated 5 times, then 2 Single Crochets at the end. Total: 36 stitches.
- Finish off: Use a stitch marker to ensure accuracy, tie knots to secure the yarn, and cut it off. The center will now have a smooth and secure base.
2: Assemble the Daisy Center
- Repeat the pattern above for both sides of the Daisy center.
- Align the centers: Position the top and bottom pieces so the stitches align. Start petals from the top.

3: Crochet the Daisy Petals
- Tip: Each petal spans 4 stitches, with a total of 9 petals to complete the Daisy.
- Petal Structure:
- In stitch 1: Chain 1 (counts as Single Crochet) + Half Double Crochet.
- In stitch 2: Double Crochet + Treble Crochet + Double Treble Crochet.
- In stitch 3: Double Treble Crochet + Treble Crochet + Double Crochet.
- In stitch 4: Half Double Crochet + Slip Stitch.

Repeat this sequence for all 9 petals.
- Tips for Petals: The petals are worked by inserting the hook through both sides of the flower center to keep it secure. Be sure to align the stitches correctly on the first petal.
- Once all petals are complete, fill the center with acrylic stuffing to give the daisy a full and plump look.
4: Crochet the Leaf
- Begin with Chains: Chain 15 stitches to form the base of the leaf.
- Foundation Row:
- Skip 4 chains and Slip Stitch into the 5th chain.
- Chain 3 and work double treble crochets into the next 5 chains.
- Treble Crochet into the next 2 chains.
- Double Crochet in the next chain.
- Half Double Crochet in the next chain.
- Single Crochet in the last chain.
- Repeat on the Opposite Side:
- Work the same sequence in reverse along the opposite side of the chain (starting with Single Crochet and finishing with Double Treble Crochets).
- End with a Slip Stitch and Chain 1 to secure.
- Finish the Leaf: Tie off the yarn and secure with knots to hide the loose ends. The leaf is now complete.

Step 5: Assemble the Daisy Keychain
- Attach Daisy and Leaf: Use jump rings to connect the Daisy and Leaf to the keychain ring.
- Ensure all attachments are secure and tighten as needed.

Conclusion
Your Crochet Daisy Keychain with Leaf is now complete! This cheerful accessory makes an adorable addition to your keys, bags, or even as a thoughtful handmade gift for loved ones. The combination of petals and a leaf provides a striking look that stands out anywhere, adding a subtle, elegant vibe to your accessories.
Tutor’s Suggestions
- Yarn Type: Use acrylic or cotton yarn for robust and polished results.
- Petal Consistency: Maintain tension when crocheting petals to ensure they’re uniform.
- Leaf Customization: Adjust the number of chains or stitches depending on the size of leaf you desire.
Pro Tip
Crochet a few extra leaves and layer them for a fuller design add beads to the center for extra pizzazz. This project is perfect for leftover yarns you’ve been saving.